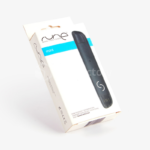
A cardboard display stand is one of the most effective tools for showcasing products in retail stores, supermarkets, or exhibitions. It is lightweight, eco-friendly, and easy to set up. Whether you’re using it to highlight seasonal products or launch a new collection, knowing how to assemble a display stand properly ensures stability and maximum visual impact.

1. Why Use a Cardboard Display Stand?
Compared with a regular cardboard box, a display stand is designed for promotion and visibility. It not only organizes products neatly but also draws customer attention with custom printing and branding. Many businesses choose custom packaging solutions like display stands to increase sales and strengthen brand identity.
2. Preparation Before Assembly
Before starting, make sure you have:
- The flat-packed cardboard box panels for the stand.
- Any included shelves, hooks, or inserts.
- Clear assembly instructions from the supplier.
3. Step-by-Step Assembly Guide
- Unfold the Base – Start with the bottom section of the stand. Fold along pre-scored lines to create the foundation.
- Secure the Structure – Lock the tabs into slots so the base becomes sturdy.
- Add Vertical Panels – Attach the backboard and side panels by sliding or locking them into the base.
- Insert Shelves or Tiers – Place shelves into the pre-cut slots. Ensure they are level to hold product weight evenly.
- Finish with Branding – Apply any printed headers, signage, or brand visuals to maximize marketing impact.
4. Benefits of Custom Packaging in Displays
A ready-to-assemble custom box can be designed to transform into a display stand. This kind of custom packaging makes logistics easier and reduces costs while still providing strong promotional value in-store.
5. Choosing the Right Supplier
To get a durable, easy-to-assemble cardboard display stand, work with a professional packaging manufacturer. A reliable partner can customize the stand’s size, shape, and printing to match your brand’s style and product needs.


